What Is Lippage and Why Does It Matter?
Lippage is the height difference between the edges of adjacent tiles. When you run your hand across a tile floor and feel one tile edge sitting higher than the next, that's lippage. On a well-installed floor, you shouldn't feel any transition between tiles.
Lippage becomes increasingly problematic, and increasingly difficult to prevent, as tile size increases. A 4×4 tile is virtually self-leveling. A 24×48 tile amplifies every substrate imperfection and every tile curvature into visible and tangible lippage.
The TCNA defines acceptable lippage as no more than 1/32" for grout joints 1/16" wide, and maximum of 1/3 the width of the grout joint for wider joints.
Why Large Format Tiles Are Challenging
Several factors make large format tile installation (tiles with any edge 15" or longer) more demanding:
Tile Warpage (Bow)
All tiles have some degree of natural curvature, called bow or warpage. Industry standards allow up to 0.125% of the tile's longest dimension in warpage. For a 24" tile, that's 0.030", barely noticeable on a single tile. But when two adjacent tiles bow in opposite directions, the lippage at their shared edge can be double that, enough to see and feel.
Substrate Flatness
Large tiles can't conform to undulations in the floor the way small tiles can. Any bump or dip in the substrate is faithfully transmitted to the tile surface.
Mortar Consistency
With greater surface area, even slight variations in mortar bed thickness create lippage.
TCNA Requirements for Large Format Tile
The Tile Council of North America has specific requirements for large format installations:
Substrate Flatness
- Standard tile (<15" edge): Flat to within 1/4" in 10 feet
- Large format tile (≥15" edge): Flat to within 1/8" in 10 feet, twice as flat
This is the most critical requirement. If your substrate doesn't meet this standard, no amount of skill or special products will prevent lippage.
Mortar Coverage
- 95% minimum coverage on both the substrate and the tile back (back-buttering required)
- Compared to 80% minimum for standard interior floor tile
Offset Pattern Limitation
- Maximum 33% offset for rectangular tiles
- The traditional 50% brick pattern (running bond) is NOT recommended for large format rectangular tiles because the center of one tile aligns with the edge of the adjacent tile, exactly where warpage-induced lippage is worst
- A 33% offset shifts the alignment so tile centers don't line up with edges, reducing visible lippage
Trowel Size
- Larger notch trowels are required, typically 1/2" × 1/2" or larger
- The goal is a thicker mortar bed that allows for adjustment and ensures full coverage
Achieving a Flat Substrate
Self-Leveling Underlayment
For concrete slabs that don't meet the 1/8" in 10' requirement, self-leveling compound is the most effective solution:
- Clean and prime the concrete surface
- Mix self-leveling compound per manufacturer instructions
- Pour and spread to the desired thickness (typically 1/8" to 1" in a single application)
- The compound flows to a naturally level surface
- Allow to cure (typically 24-48 hours before tiling)
Grinding
High spots can be ground down with a concrete grinder. This is effective for isolated bumps but not practical for large-area correction.
Medium Bed Mortar
For substrates that are close but not quite flat enough, medium bed mortar can compensate for minor irregularities (up to 3/4" thickness vs standard 1/4").
Tile Leveling Systems
Tile leveling systems are mechanical devices that force adjacent tiles to the same height while the mortar cures. They've become standard practice for large format installations.
How They Work
Most systems use two components:
- A clip or base that slides under the tile edge, spanning the grout joint between two adjacent tiles
- A wedge, cap, or spinning mechanism that tightens against the clip, pulling both tile edges to the same plane
The clips and wedges remain in place while the mortar sets. Once cured, the protruding portion snaps off cleanly at or below the tile surface.
Popular Systems
- Wedge-and-clip systems (Raimondi, MLT): Reusable wedges with disposable clips
- Spin-cap systems (Leveling System T-Lock, Perfect Level Master): Threaded posts with spinning caps
- Tombstone/flat spacer systems (LevTec): Combined spacer and leveling function
When to Use Leveling Systems
- Always for tiles with any edge 15" or longer
- Recommended for tiles 12" and larger
- Essential for thin porcelain panels and slab-format tiles
Back-Buttering
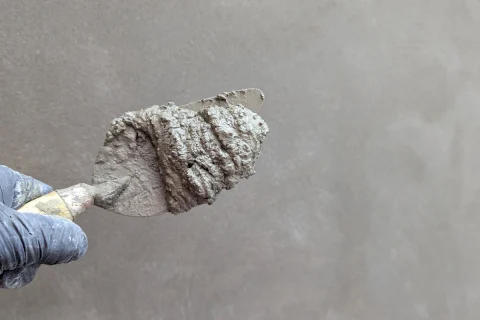
Back-buttering means applying a thin layer of mortar to the back of the tile in addition to the mortar combed on the substrate. For large format tiles, this is not optional. It's required.
Technique
- Comb mortar on the substrate with the appropriate notched trowel
- Apply a thin, flat layer of mortar to the entire back of the tile using the flat side of the trowel
- Set the tile into the substrate mortar and press firmly
- Slide the tile slightly to collapse the mortar ridges and achieve full contact
- Use a leveling system to align with adjacent tiles
Step-by-Step Large Format Installation
- Verify substrate flatness (1/8" in 10' or better)
- Level the substrate if needed (self-leveler, grinding, or medium bed)
- Dry-lay tiles to plan the layout and minimize cuts
- Mark layout lines with chalk lines for straight, symmetrical placement
- Mix mortar: use modified thin-set or large format mortar per tile requirements
- Apply mortar to substrate with the correct trowel size, combing in one direction
- Back-butter each tile before setting
- Set the tile firmly, using a slight sliding motion to collapse ridges
- Install leveling system clips and wedges at each tile edge
- Verify level and alignment continuously as you work
- Allow mortar to cure 24 hours minimum
- Remove leveling system: snap off clips, remove wedges
- Grout, clean, and seal
The Bottom Line
Large format tile installation is a specialty skill. The difference between a professional installation with zero lippage and a problematic installation with visible edges comes down to substrate preparation, proper mortar technique, and the disciplined use of leveling systems.
This is one area where professional installation pays for itself. At Evolution Tile Inc, we install large format tiles throughout San Diego and Los Angeles using the full system of substrate leveling, back-buttering, and mechanical leveling that these tiles demand. Contact us for a flawless large format installation.